
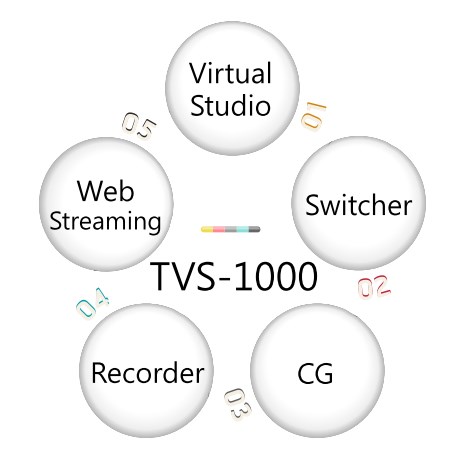
Trackless Virtual Studio System จาก Datavideo ถูกออกแบบมาให้ มี 5 ส่วนประกอบสำคัญที่ต้องใช้งานใน Studio รวมกันในหนึ่งเดียว ซึ่งจะประกอบไปด้วย Virtual Studio, Video Switcher, Charactor Generator, Video Recorder และ Web Streaming Encoder มันถูกออกแบบให้มีความหลากหลาย และง่ายต่อการใช้งาน ด้วยค่าใช้จ่ายที่คุ้มค่ากว่า
Virtual Studio ระดับมืออาชีพ ที่มีกล้องวิดีโอเพียงตัวเดียว
TVS-1000 ได้ตระเตรียม platform ระดับมืออาชีพ ไว้ให้ผู้ใช้ ได้สร้างโปรดักชั่นวิดีโอที่น่าสนใจ และ นำเสนอสิ่งที่ไม่เหมือนใคร ภายในไม่กี่นาที สำหรับ multi-layer result นั้น TVS-1000 รองรับ 2 DSK และสามารถใส่ CG และ animation ในทุก ๆ ซีน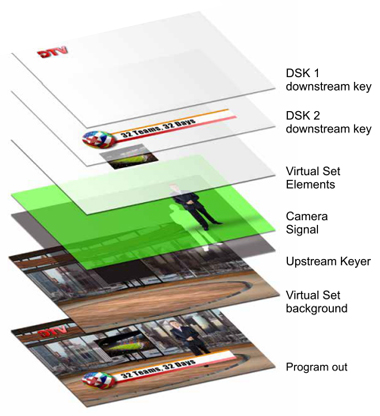
30 ฟรี เซ็ต สำหรับสร้างวาไรตี้ Virtual Studio
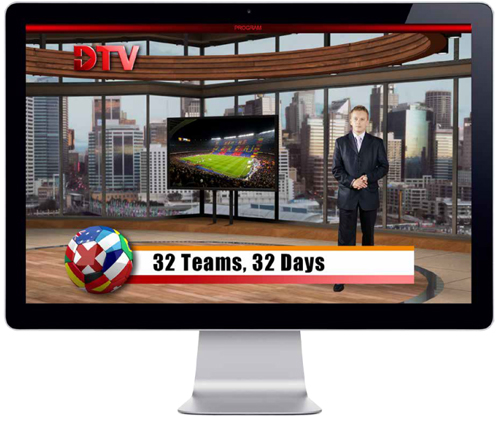
TVS-1000 มาพร้อม 20 Virtual Scenes ซึ่งแต่ละซีน ถูกออกแบบมาให้รองรับ 4 มุมมองที่แตกต่างกันได้ ซึ่งจะช่วยสร้างความสมจริง และยึดหยุด ให้ Virtual Studio ของคุณได้อย่างเหลือเชื่อ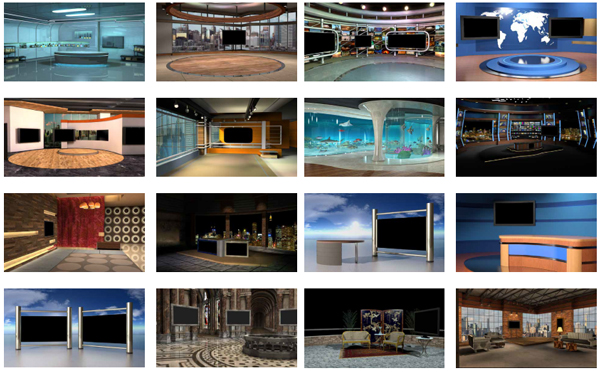
5 ขั้นตอนง่าย ๆ ในการสร้าง Virtual Studio ด้วย TVS-1000
Step 1 เตรียมการ
ฉากหลังสีเขียว, แสงไฟ และ กล้องที่มี HDMI Output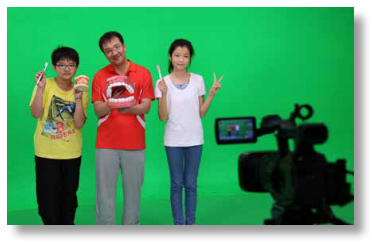
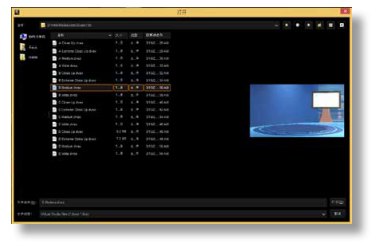
Step 2 เลือกรูปแบบของ Virtual Set รูปแบบต่าง ๆ ที่ต้องการใช้งาน
Step 3 การเจาะคีย์
ใช้ Chromakey wizard ช่วยในการ เจาะเอาพื้นสีเขียวออก ได้อย่างเนียนที่สุด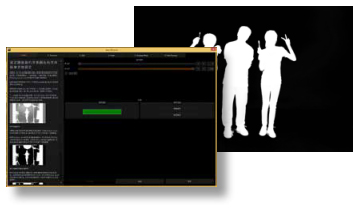
Step 4 ตั้งค่า Phase
ปรับ virtual phase ของตำแหน่งกล้อง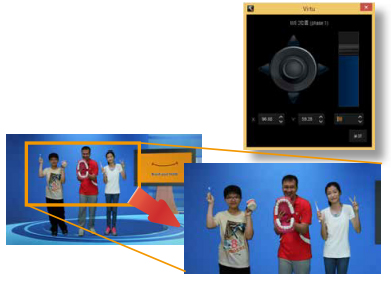
Step 5 ตั้งค่า DSK
ใส่ คำบรรยายใต้ภาพ หรือ animation ต่าง ๆ ด้วย DSK downstream key
Step 6 Program Out
ส่งภาพออกไป บันทึก, สตรีมมิ่ง และ ถ่ายทอดสื่อออกไปแสดงผล User Interface ใช้งานง่าย และ ครบครันทุกความต้องการใช้งาน